
How to Find and Delete Duplicate Files on Mac: 4 Proven Ways
 10.0K
10.0K
 2
2


Duplicate files on your Mac can take up storage space and lead to disorganization or even confusion. Don't worry. In this article, I will show you how to find and delete duplicate files on Mac in different ways, providing step-by-step instructions and helpful details.
 Cisdem Duplicate Finder
Easily Find All Duplicate Files on Mac
- Identify duplicate photos, videos, audio files, and all other files
- Detect similar photos as well
- Support Mac, external storage devices, and more
- Find duplicates files in folders, Photos, and Music
- Display duplicate files for you to preview side by side
- Automatically select all but one file for removal in each set of duplicates, enabling you to delete all duplicates at once
- Let you adjust selections manually or choose from 8 rules (e.g., Select Newest)
- Easy to use for everyone


A quick comparison of these methods
| Method | Use software | Use Terminal | Use Finder | Use Photos or Music | |
|---|---|---|---|---|---|
| Work with | Folders, Photos, Music | Folders | Folders | Photos | Music |
| Automatic duplicate detection | Yes | Yes | No | Yes | Yes |
| Detection technique | Compare hashes | Compare hashes | - | Compare visual content | Compare metadata |
| Accuracy | 100% | 100% | 60% or above | 100% | 50% or above |
| Ease of use | Excellent | Poor | Poor | Good | Good |
Method 1. Automatically find duplicate files with dedicated software
The easiest way to find duplicate files on Mac is to use duplicate file finder software. Cisdem Duplicate Finder identifies duplicate images, videos, audios, documents, PDFs, archives and all other duplicate files on Mac, including those in folders, Photos/iPhoto and Music/iTunes. In addition to files that are exactly identical (regardless of name), it identifies similar photos.
Further Information
This app identifies duplicate files by comparing files' hashes and sizes. The hash (or hash value) is generated based on a file's content, which is like the fingerprint of the file. If two files share the same hash, they are duplicates. The app also makes measures to prevent hash collisions (which are very very rare though) to further improve accuracy.
With this piece of software, you can conveniently preview duplicate files and quickly remove all unwanted duplicates with a single click.
Below are the steps.
1. Install the software.
Download and install Cisdem Duplicate Finder. Open it.
 Free Download macOS 10.11 or later
2. Add a location on your Mac to scan for duplicate files.
Click the Add button  , select one or multiple folders and click Open.
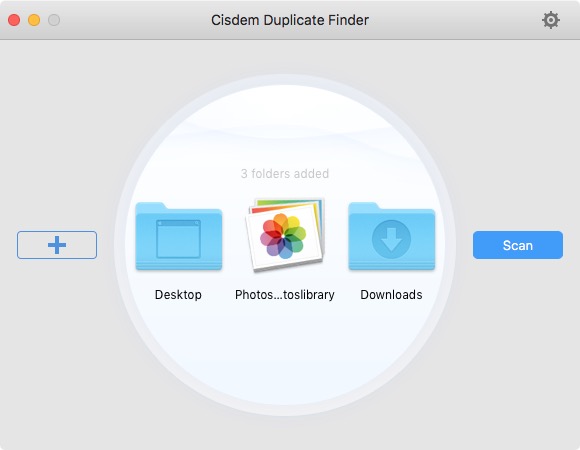
To find duplicates in Photos or Music, add the Photos library or add the Music Media folder.
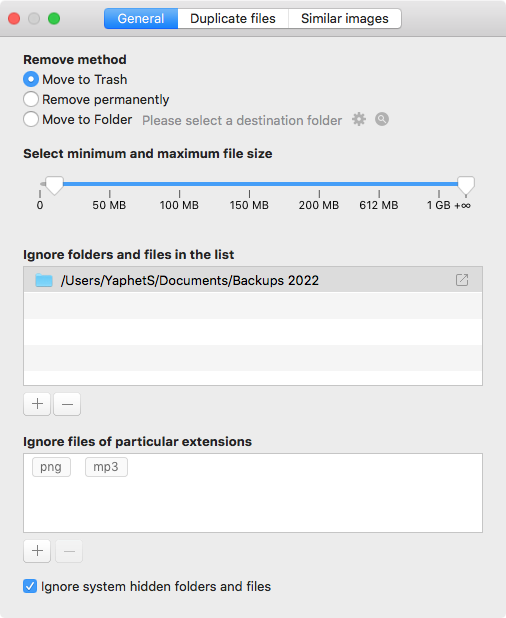
3. Customize the settings.
This step is optional. Click the Settings button  and customize the settings based on your needs. For example, you can exclude certain files from the scan by specifying a file size range, the folder, or the file extension (such as “png”) and turn on/off the feature to find similar photos.
4. Click Scan.
Click the Scan button on the right to start the scan.
5. View the found duplicate files.
When the scan is complete, the results window will appear, displaying all duplicate files under the All tab. To only view a specific type of duplicate files (like duplicate photos), go to its tab (like Image). There are three view modes  .
.
The built-in preview feature lets you preview images, audios, videos, documents, PDFs and more.
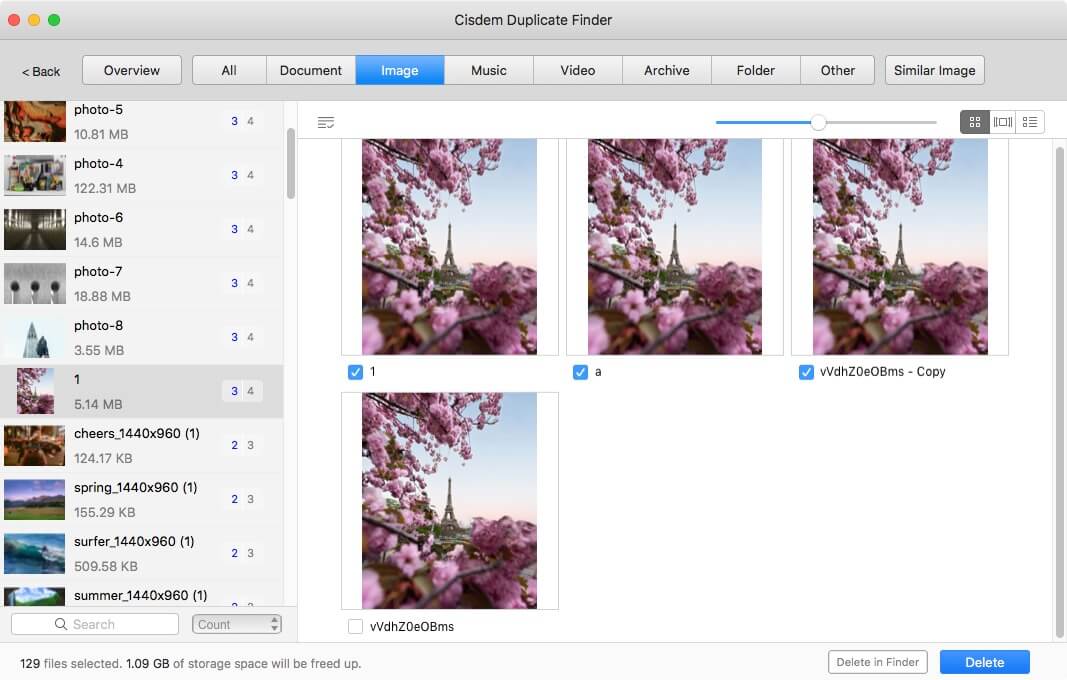
6. Select unwanted duplicates for removal.
In each set of duplicate files, the software has already automatically selected all but one file for elimination.
You can also select or deselect by hand.
In addition, you can use a selection rule. On the left, highlight the sets to which you want to apply a rule by clicking them. Click the List button ![]() to choose a rule.
to choose a rule.
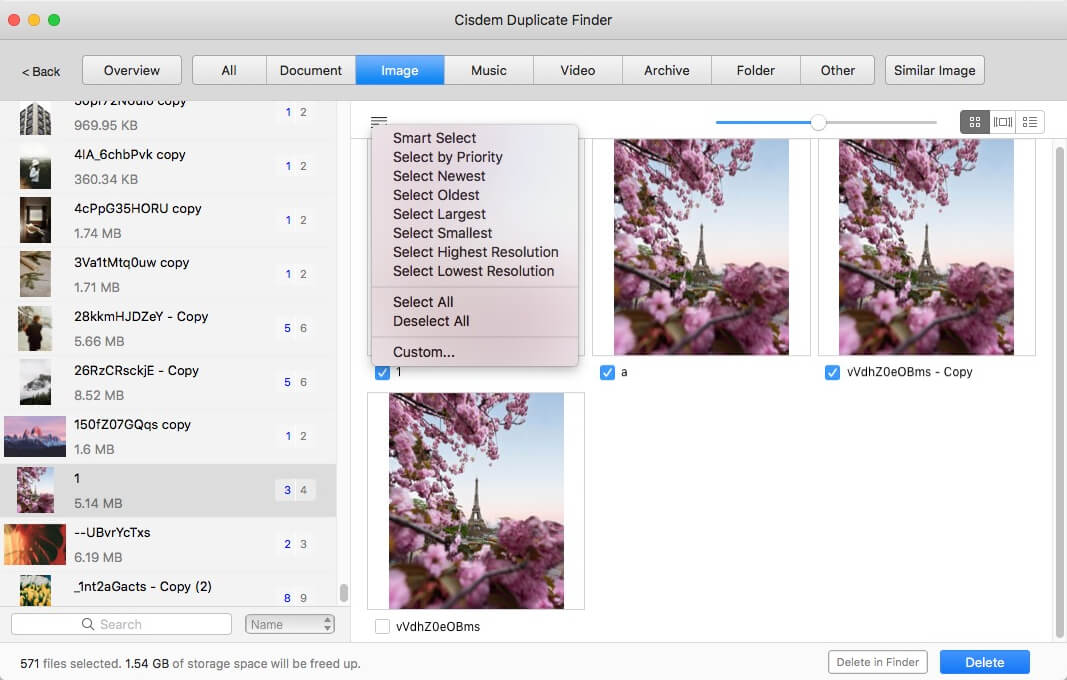
7. Remove duplicate files.
Click the Delete button in the bottom right corner to delete all selected files. Confirm the deletion by clicking Yes in the message that appears.
By default, the deleted files go to Trash.
Method 2. Automatically find duplicate files with Terminal
Terminal, which is included with macOS, provides a command-line interface to macOS. You can use it to do a lot of cool things, such as searching for duplicate files.
Note
If you are not comfortable or confident with the command-line interface, it's recommended to ignore this method.
This method computes the hash value of every file in the folder you specify and identifies duplicates by comparing hash values. The method does a good job of finding files that are exactly the same (regardless of name).
But this free method doesn’t help you remove the duplicate files that it finds. You need to do it manually.
Below are the steps.
1. Open Terminal.
Open Launchpad, type Terminal in the search field at the top, and click Terminal. Alternatively, open Finder, go to Applications > Utilities, and click Terminal.
2. Specify the location in which you want to look for duplicate files.
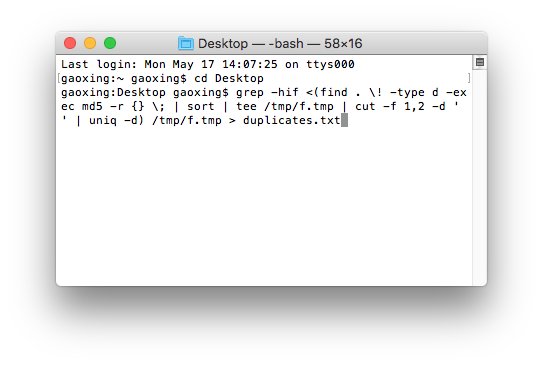
For folders that come with your Mac (like Desktop and Documents), enter something like “cd Desktop” or “cd Documents”, and press Return.
For other folders, say, folder ABC, enter “cd” and a space, open folder ABC in Finder, and drag this folder into Terminal. Press Return.

3. Enter the command and press Return.
grep -hif <(find . \! -type d -exec md5 -r {} \; | sort | tee /tmp/f.tmp | cut -f 1,2 -d ‘ ‘ | uniq -d) /tmp/f.tmp > duplicates.txt
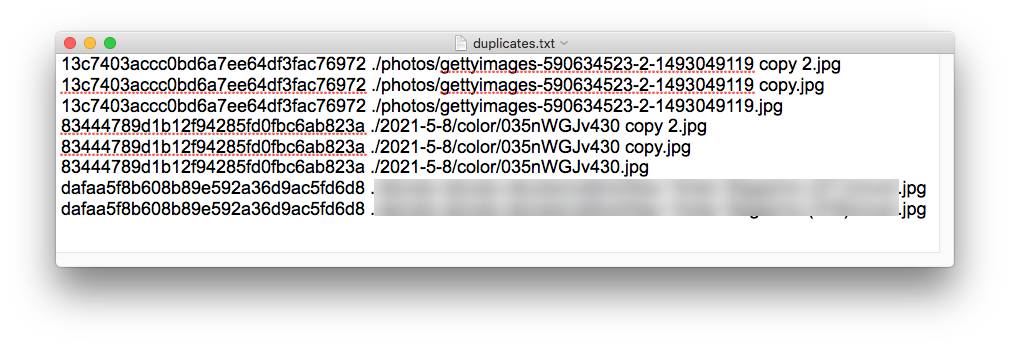
4. Go to the specified location to open duplicates.txt.
The time that Terminal takes to compute and compare hash values depends on the number of files it deals with. When the process is complete, open the file duplicates.txt (which is created by Terminal).
As shown in the screenshot below, in each line, this text file displays the file path on the right and the file hash value on the left. Files are sorted in a way that you can effortlessly spot every set of duplicate files.
5. Move duplicate files to Trash.
Thanks to the file paths provided in the text file, you can locate the duplicate files in Finder. Erase duplicates by moving them to Trash.
Tip
If you want to use Terminal to find a specific type of duplicate files, say, duplicate JPG photos, use the following commend instead in step 3.
grep -hif <(find . \! -type d -iname '*.jpg' -exec md5 -r {} \; | sort | tee /tmp/f.tmp | cut -f 1,2 -d ' ' | uniq -d) /tmp/f.tmp > duplicates.txt
Method 3. Manually look for duplicate files with Finder
Another free method is to use Finder, a file management app included with macOS. Finder can’t find duplicate files, but its Smart Folder feature can help make the manual identification of duplicate files easier and quicker. With this method, it’s recommended to handle only a type of duplicate files (such as duplicate photos or videos) at a time.
Note
This method takes time and patience. It can be practical only when handling a relatively small number of files. What's more, manual detection of duplicates isn't always reliable.
Below are the steps.
1. Open a folder in Finder.
Open Finder by clicking its icon in the Dock. Navigate to the folder of your choice.
2. Start a search.
Start a search in the Finder window with Command-F.
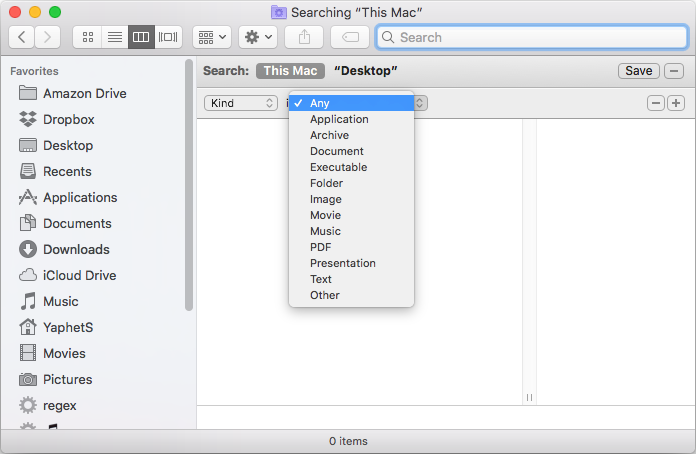
3. Specify the search criteria.
Click the pop-up menu on the left and choose Kind. (If you can’t see Kind, choose Other instead, select Kind, and click OK.) Click the pop-up menu on the right and choose Image. (Specify an image format in the new pop-up menu if needed.) This will display all the images in this folder, including those in subfolders.
4. Choose a view.
In the Finder toolbar, click the Icon view button  . (You can use other views like List, Column or Gallery. In my case, the Icon view makes it easy for me to spot duplicate files.)
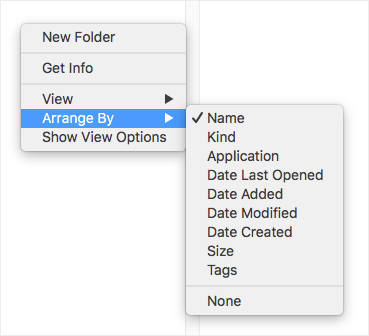
5. Sort files.
Sort the image files by Size, Name, Kind, Date Created or another attribute. Choose the attribute that makes it the easiest for you to spot duplicates.
6. Compare files to identify duplicates.
Now it’s relatively easy for you to look for duplicate files. Compare files to identify them. For example, you can identify duplicate photos by comparing their visual contents and dimensions.
7. Remove duplicates.
Get rid of unnecessary duplicates by moving them to Trash.
As you can see, this method is flexible. You can use it in the way most efficient for you.
Method 4. Automatically find certain duplicates with Photos or Music
Like Method 2 and Method 3, this method is also free. Unlike the three other methods, it only deals with a certain type of duplicates.
Use Photos
1. Open Photos.
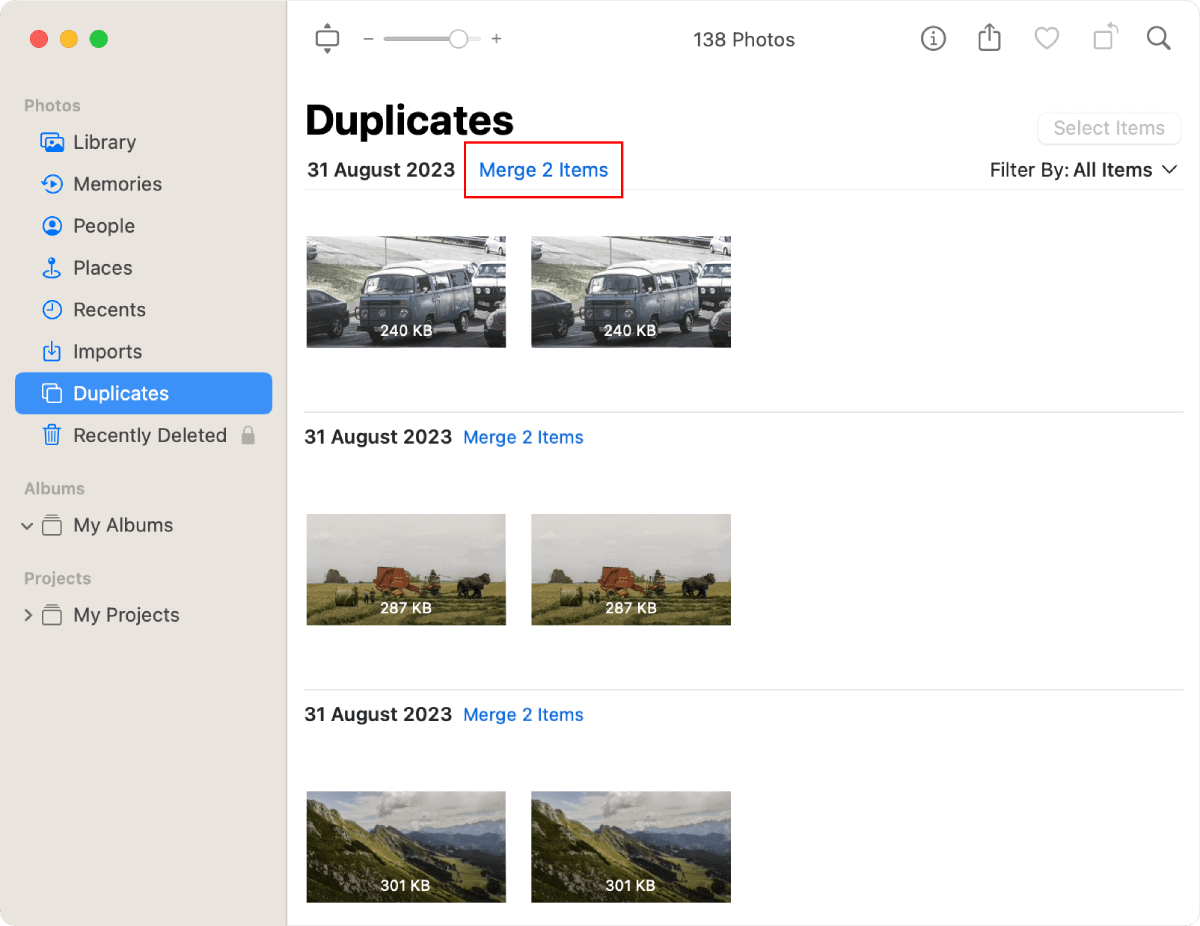
Open the Photos app. In the left sidebar, choose Duplicates.
2. Check duplicate photos.
The Photos app automatically detects duplicates in your library in the background by comparing visual content. If you see nothing in your Duplicates album, then just waiting for the detection to finish. (It may take hours, days, or even weeks.)
If you see sets of duplicates, go to step 3.
3. Merge duplicates.
For each set, click the Merge Items button next to it to remove duplicates.
Use Music
1. Open Music.
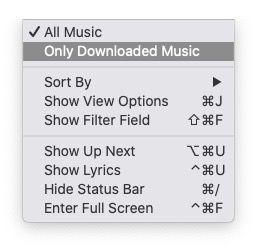
Open the Music app. In the sidebar on the left, click Songs. In the View menu, choose All Music instead of Only Downloaded Music.
2. Control-click a column heading.
In the list of attributes that appears, make sure that you choose Album, Artist, Bit Rate, Cloud Download, Cloud Status, Kind and Time.
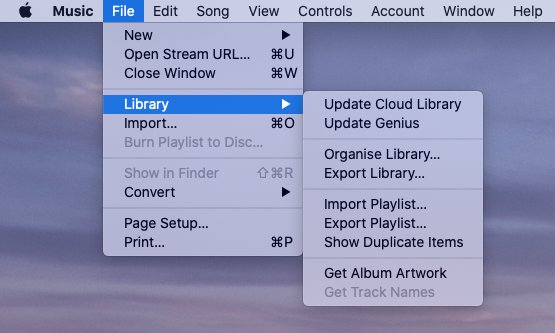
3. Go to the File menu.
Hold down the Option key and choose Library > Show Exact Duplicate Items. Now, you will only see sets of duplicate songs.
4. Delete duplicate songs.
You need to go through each set and decide which track(s) to keep and which track(s) to delete. You can make the decision based on your needs.
Here’s what I do. First, I download the songs that are not downloaded yet. Next, I compare the songs in each set. I prefer tracks with the higher bit rate or more complete info and tracks that I have “loved” or rated. Finally, I select the duplicate tracks that I don’t need, control-click, and choose Delete from Library.
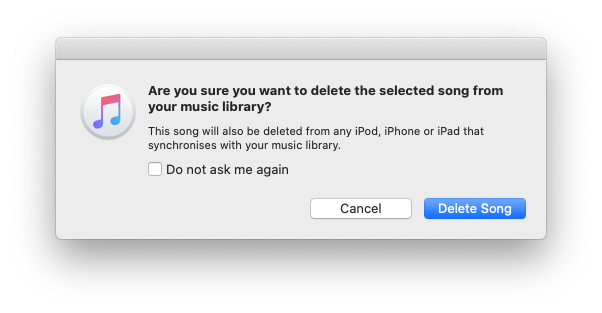
5. Confirm the deletion.
In the message that appears, click Delete Song(s). In the message that appears, click Move to Trash. This way, the duplicate music files will be deleted and go to Trash.
After you remove duplicate tracks, you can still see them in your Library. Don’t worry. They don’t really exist. You can get rid of them using Smart Playlist.
Tip
In step 3, if you don’t hold down the Option key, you will see the Show Duplicate Items option. Choosing this option will find more duplicates, for example, the same song that appears on a studio album and a live album.
Conclusion
Why do I have duplicate files on my Mac? Well, there can be various reasons. Some behaviors can lead to duplicate files. For example, sometimes you may download or import the same files to your Mac twice more even more without knowing it. Syncing files and backing up files can also create duplicates. If you are not happy with having them on your Mac, this article can definitely help.
The article talks about four ways to find and delete duplicate files on Mac. Three of them are free and built in to your Mac. The first method is the most efficient and effective one. If you are not after efficiency or if there aren’t many files on your device, the second or third method can be a choice.

With a passion for tech and writing, Sarah joined Cisdem, where she focuses on creating articles about using utility tools to enhance file management and simplify contact management.

Adrian Li is Cisdem’s Chief Engineer and serves as the editorial advisor for Duplicate Finder and ContactsMate. His work and insights have been featured in leading tech publications such as Fossbytes, TUAW, Redmond Pie, SafetyDetectives, and BestForAndroid.
Joachim Meinold
Exactly what I was looking for, and very detailed instructions. Thank you!
Birgit Walenta
I had lots of useless duplicate files on my mac, and i followed these steps and now they are all gone!!! thank u!