
How to Use PowerShell to Find Duplicate Files in Folders: Detailed Guide
 4.3K
4.3K
 0
0


Key Takeaways
PowerShell, which is pre-installed on Windows and also available for several other OS, can help users automatically find and delete duplicate files.
If you are technical and familiar with commands and don't need to preview duplicates before deleting, you can use PowerShell.
If you are not comfortable with commands and want to easily preview duplicate files, you can use an alternative method.
Duplicate files take up storage space and can make it harder to locate the files you need. Luckily, there are several ways to find and remove them on your computer. Using PowerShell is one of them.
In this article, I will show you detailed steps to use PowerShel to find and delete duplicate files folders. I tested this method, and it really worked.
 Cisdem Duplicate Finder
Not Comfortable with PowerShell? Try This
- Accurately identify duplicate images, videos, audio files, and all other files
- Detect similar images too
- Support Windows PC, Mac, external storage devices, cloud drives, and more
- Find duplicate files in folders, iTunes, and Mac's Photos
- Let you view duplicates in 3 ways, with side-by-side photo previews
- Automatically select all but one file for removal in each group of duplicates, enabling you to delete all duplicates at once
- Let you adjust selections manually or choose from rules (e.g., Select Newest)
- Easy to use for everyone


Well, what is PowerShell?
PowerShell, as you may have known, is a tool by Microsoft that can help users do many tasks. It can be considered a command-line tool if you like. In this tool, users can use scripts to make many tasks easier, for example, managing files, sending emails, and more.
You can use PowerShell to find duplicate files in folders by comparing their hashes. Then, take appropriate actions as needed, for example, letting PowerShell automatically delete duplicates for you, or manually delete duplicates from folders one by one.
Further Information
A hash value is a unique value that corresponds to the content of a file. If two files share the same hash value, they are a group of duplicates.
Pros and cons of using PowerShell to find duplicate files
The PowerShell method has the following advantages and disadvantages.
Pros
- Accurately identify duplicate files in a folder, regardless of file names
- Help you automatically delete all duplicates, keeping the first file in each group
- Built in to Windows and free to use
Cons
- Difficult and cumbersome for users who are not good at computer
- May return wrong results or miss some duplicate files when the script is written incorrectly or the conditions are not set accurately
- No file previews before deletion
- No option for you to decide which files to keep or delete
- Delete duplicates permanently, making it hard to restore files
My Take
This method requires some technical and programming knowledge, otherwise you might find it a bit complicated. If you only have basic computer skills or want to save time, there are plenty of free duplicate finder software on the market that can better help you.
How to find and delete duplicate files in folders with PowerShell
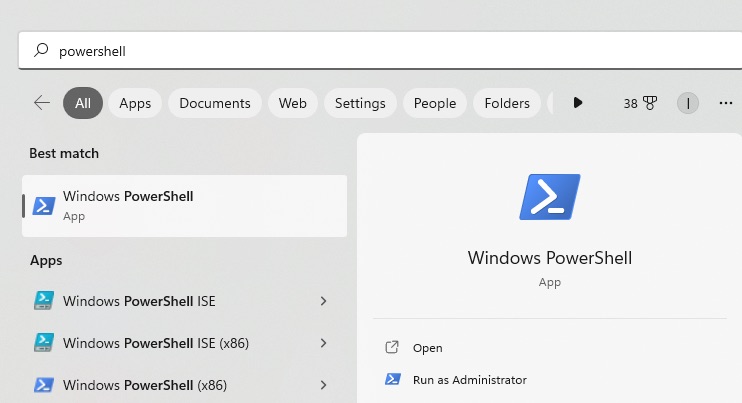
1. Open PowerShell on your Windows computer. You can search for “PowerShell" in the start menu and run it as administrator.
2. And, well, now you can use the cd (which means change directory) command to change the current directory (can be considered a path or folder) into the location where you want to scan for duplicates. For example, to find duplicates in the "Downloads" folder, you can use the following thing below:
cd C:\Users\YourUsername\ Downloads
Then press Enter on your keyboard.

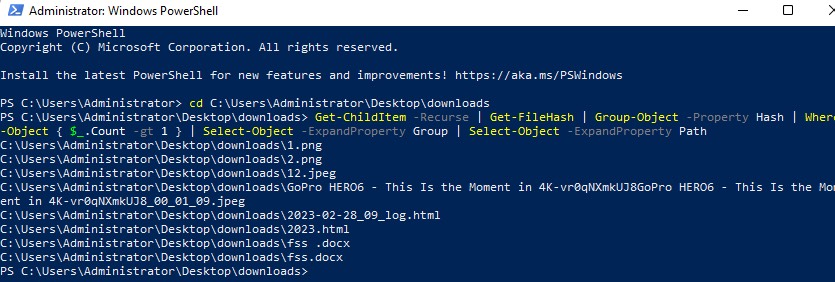
3. Run the following command to count the hash value of each file in this folder to find duplicate files:
Get-ChildItem -Recurse | Get-FileHash | Group-Object -Property Hash | Where-Object { $_.Count -gt 1 } | Select-Object -ExpandProperty Group | Select-Object -ExpandProperty Path
Press Enter. Wait for the command execution to complete. This may take some time, depending on the number and size of files in the folder. Then it will group files in this folder by their hash.
Note
You can't open or preview a file in PowerShell. To view a duplicate, you need to open it in File Explorer.
4. Now you can run the following command to remove all files except the first one from each group of duplicates:
Get-ChildItem -Recurse | Get-FileHash | Group-Object -Property Hash | Where-Object { $_.Count -gt 1 } | foreach {
$group = $_.Group | Select-Object -ExpandProperty Path
$group | Select-Object -Skip 1 | Remove-Item -Force
}
Press Enter. Go back to the folder that had duplicate files before, and you will find that all duplicates are removed.
Note
The deletion is permanent. In other words, deleted duplicates aren't sent to the Recycle Bin. For file safety, you may want to back up files before deleting duplicates.
An easy alternative way to find and remove duplicate files in folders
In fact, using PowerShell can help you quickly and accurately find duplicate files in folders, but the premise is that you are familiar with this tool. For most users, directly using third-party duplicate finder tool is the most efficient way. Cisdem Duplicate Finder is a reliable one.
Compared with PowerShell, this tool has several advantages.
- Allow you to scan one or multiple folders at once
- Accurately identify duplicate files by comparing both files' hash values and sizes
- Divide the found duplicate files into categories: images, music, documents, videos, etc.
- Offer 3 preview modes, including side-by-side one
- Enable you to view detailed information of the files, such as path and size
- Automatically select duplicate files for you to delete with 1 click
- Provide 8 selection rules to help you mass select duplicates
- Also allow you to manually choose duplicate files to remove
- Send deleted duplicates to the Recycle Bin by default (and also allow you to move them to a folder, or perform permanent deletions)
Let’s see the easy steps on how to use this tool to find duplicate files in folders:
1. Download and install Cisdem Duplicate Finder on your computer.
 Free Download Windows 10 or later
  Free Download macOS 10.11 or later
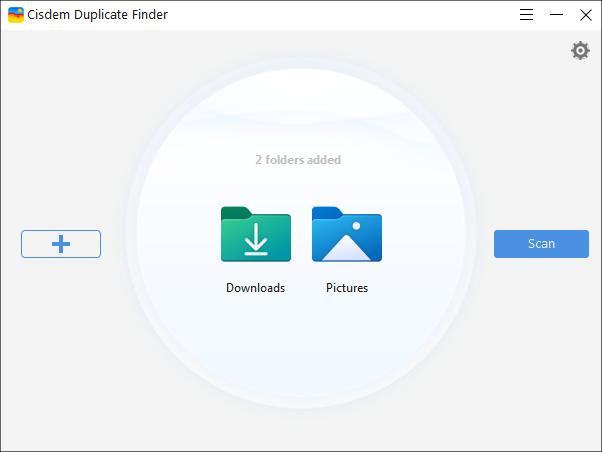
2. Click the plus icon on the main window. Add one or more folders to scan.
Or directly drag and drop folders to this tool.
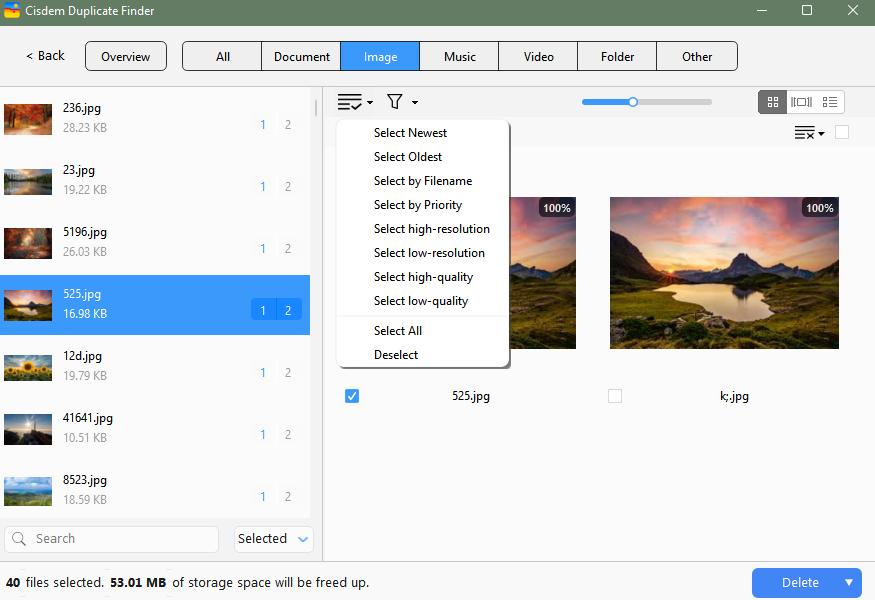
3. It scans fast. And then displays a list of duplicate files that were found. This tool will auto-select duplicates for you to remove. You can directly delete them with 1-click. Or preview the files before removing.
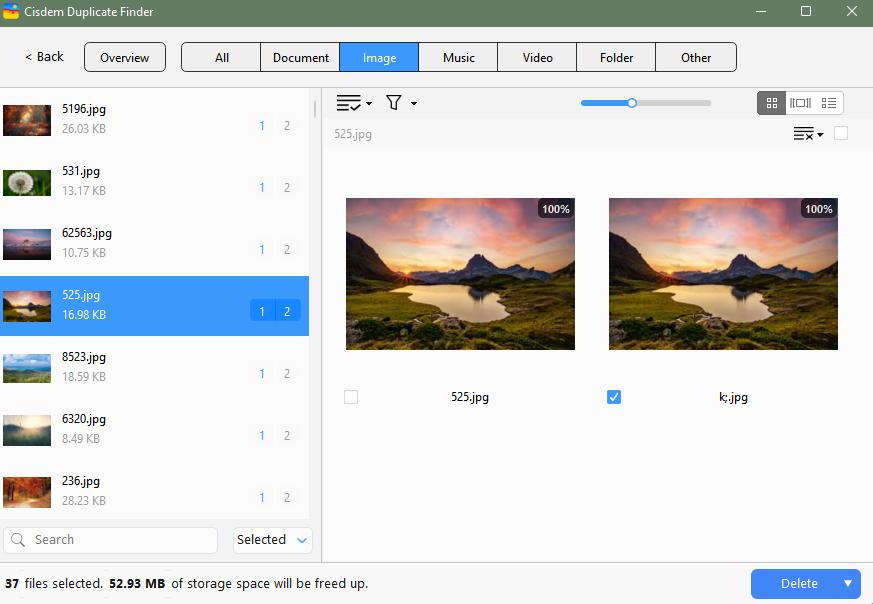
You can also change the preview mode to view files’ details.
4. The selection rules is for helping you mass select duplicate files in folders to remove. Such as select by priority, select oldest, largest, etc.
5. After checking the selected duplicate files, click on Delete on the bottom right corner.
FAQs
Does Windows have a duplicate file finder?
No. Windows doesn't come with such a tool. Although PowerShell can be used for this purpose, it's not a good idea to refer to it as a duplicate finder.
How do I remove duplicate files using PowerShell?
As with finding duplicate files using PowerShell, you need to run a dedicated script, as shared in step 4 above.
Conclusion
You can use PowerShell to find duplicate files in folders. I’ve showed you detailed steps about how to use it to search and delete duplicate files with different names but same contents in this article. In addition to PowerShell, some other professional duplicate finder tools also allow you to automatically find and remove duplicate files in folders quickly and easily. Whichever method you choose, remember to regularly clean up duplicate files to keep your files organized and free up computer storage space.

With a passion for tech and writing, Sarah joined Cisdem, where she focuses on creating articles about using utility tools to enhance file management and simplify contact management.

Adrian Li is Cisdem’s Chief Engineer and serves as the editorial advisor for Duplicate Finder and ContactsMate. His work and insights have been featured in leading tech publications such as Fossbytes, TUAW, Redmond Pie, SafetyDetectives, and BestForAndroid.